

When building modern media applications—podcasts, music players, or video editors—a great way to enhance the user experience is to visually represent sound through waveforms. These waveforms allow users to see audio dynamics and make navigation easier.
In this article, we'll explore how to generate high-quality audio waveform images using two powerful open-source tools: FFmpeg and Audiowaveform. Both tools are available on Linux and can be used in server-side rendering pipelines or local development environments.
Why Use Audio Waveforms?
Audio waveforms provide a graphical representation of sound amplitude over time. Use cases include:
- Displaying the audio timeline in podcast or music players
- Enabling users to visually seek to specific parts of an audio file
- Enhancing UX for audio or video editing apps
- Creating previews or thumbnails for audio files
Creating High-Precision Waveforms with Audiowaveform
Audiowaveform is a tool developed by the BBC for producing precise waveform data (JSON or image), ideal for interactive web apps.
⚙️ Installing Audiowaveform
Option 1: Using apt (some distros)
sudo apt install audiowaveform
Option 2: Build from Source
git clone https://github.com/bbc/audiowaveform.git
cd audiowaveform
cmake .
make
sudo make install
🖼️ Generating a PNG Waveform Image
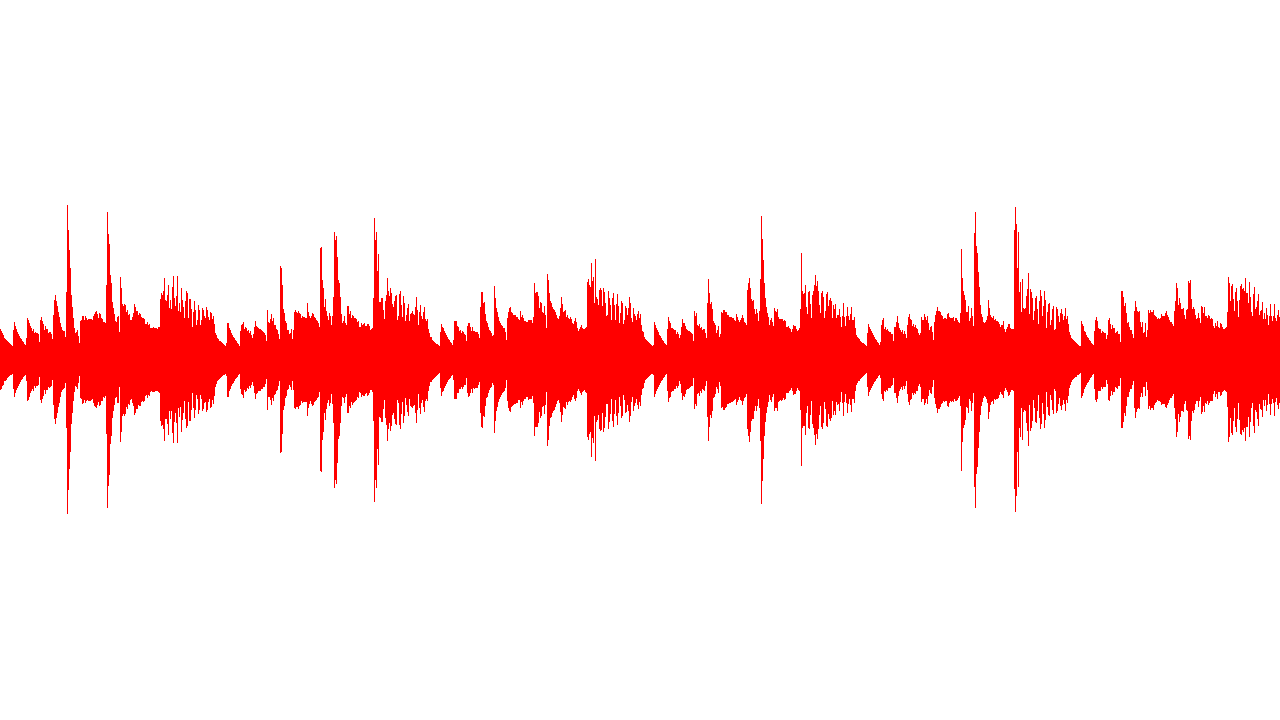
audiowaveform -i audio.mp3 -o output.png -w 1280 -h 720 --no-axis-labels --background-color 000000 --waveform-color cccccc
This command is currently how Publitio generates a thumbnails and cover photos for Publitio audio player.
Size of the image is by default set to 1280x720, background color to black (000000) and waveform color to grey (cccccc) or current player default color.
This command takes about a second to execute for our demo audio file (19s).

🔚 In Summary
Audiowaveform is a powerful tool when you need to:
- Visualize audio cleanly and efficiently
- Extract amplitude data for interactive displays
- Generate static previews or waveform images
- Process audio programmatically on the server side
It's lightweight, fast, and much more precise than FFmpeg's showwavespic when accuracy and interaction matter.
Sadly, audiowaveform does not provide animating or image manipulations like transparency or overlays.
🔧 Installing FFmpeg
sudo apt update
sudo apt install ffmpeg
🎨 Generating a Simple Waveform Transparent Image
ffmpeg -i audio.mp3 -filter_complex "aformat=channel_layouts=mono,showwavespic=s=1280x720" -frames:v 1 output.png
Explanation:
- aformat=channel_layouts=mono: converts stereo to mono for a unified waveform
- showwavespic: the actual waveform filter
- s=1280x720: output image resolution
- -frames:v 1: outputs one frame (since it's a static image)
As you can see the image is actually transparent which gives us more options over it such as having a static background.
ffmpeg -i audio.mp3 -i background.jpg -filter_complex "[0:a]aformat=channel_layouts=mono,showwavespic=s=1280x720:colors=white[waveform]; [1:v][waveform]overlay=(main_w-overlay_w)/2:(main_h-overlay_h)/2" -frames:v 1 output.pngInstead of having only audio.mp3 as an input to a command we provide an image background.jpg as well which will merge the image and a transparent audio waveform as an overlay.
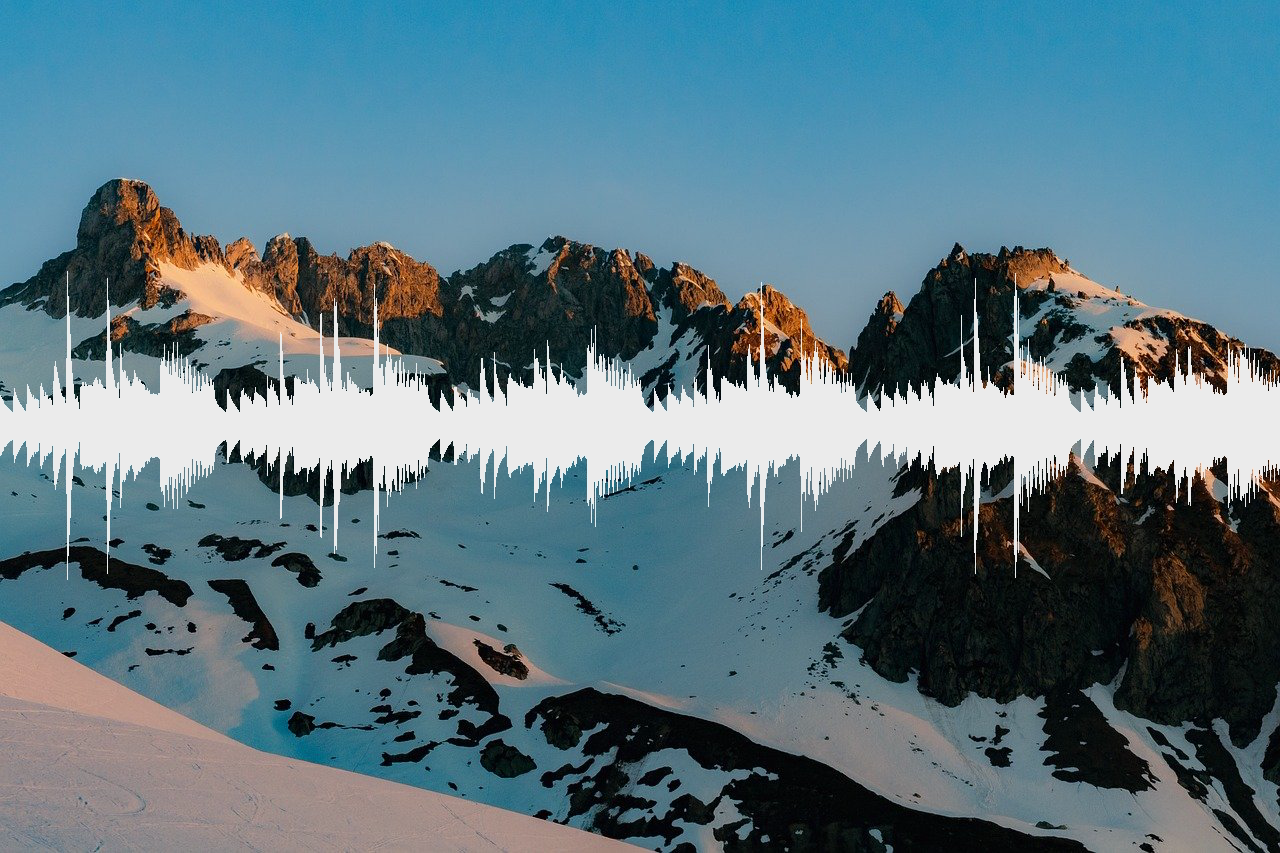
This looks way nicer already!
FFmpeg has a lower accuracy in audio analyzing but it provides much more options we can play around with when creating waveforms and visualizers.
Lets go a step further and try and create an actual live visualizer. In this case the output of our commands will instead of images be a video for this we will use showwaves and showspectrum filters.
ffmpeg -i audio.mp3 -filter_complex "[0:a]aformat=channel_layouts=mono,showwaves=s=1280x720:mode=line:rate=30:colors=white" -pix_fmt yuv420p -tune fastdecode -r 30 -y visualizer.mp4
This command will take about 3 seconds with our audio file of 19 seconds. But provides a very nice results, take a look:
We can make the soundwave symmetrical, looks nicer in my opinion:
ffmpeg -i audio.mp3 -filter_complex "[0:a]aformat=channel_layouts=mono,showwaves=s=1280x720:cline:colors=white" -pix_fmt yuv420p -tune fastdecode -r 30 -y visualizer.mp4Now we can combine everything we learned so far to make waveform an overlay to our background image:
ffmpeg -i audio.mp3 -loop 1 -i background.jpg -filter_complex "[0:a]aformat=channel_layouts=mono,showwaves=s=1280x720:mode=cline:rate=30:colors=white[waveform]; [1:v]scale=1280:720[bg]; [bg][waveform]overlay=shortest=1" -pix_fmt yuv420p -r 30 -tune fastdecode -y visualizer.mp4Lets push FFmpeg even more, you might seen circular waveforms in other media platforms:
Combination of showwaves and geq (general equation filter). This is an advanced hack, and while FFmpeg doesn't natively support circular/radial waveform generation, this trick warps the linear waveform into a circular shape using pixel mapping:
ffmpeg -i "audio.mp3" -i background.jpg -filter_complex "[1:v]crop=1280:720[bg];[0:a]aformat=cl=mono,showwaves=1280x720:cline:colors=white:draw=full,geq='p(mod(W/PI*(PI+atan2(H/2-Y,X-W/2)),W), H-2*hypot(H/2-Y,X-W/2))':a='alpha(mod(W/PI*(PI+atan2(H/2-Y,X-W/2)),W), H-2*hypot(H/2-Y,X-W/2))'[a];[bg][a]overlay=(W-w)/2:(H-h)/2" -c:v libx264 -c:a copy -t 10 circular_waveform.mp4 -y
Wolla! Our journey through waveforms is coming to an end. I hope you like our final product as this may become a part of Publitio very soon 🤭 as we plan on giving our audio player a little love as well.
Final Thoughts
Waveforms turn invisible audio into visible and interactive media. Whether you're building a podcast player or just want to enhance media previews, tools like FFmpeg and Audiowaveform are invaluable in your developer toolkit.
Thank you for following through and see ya in the next journey.


