
What is a screen capture tool
A screen capture tool, also known as a screenshot or screen recording tool, is software that allows you to capture images or videos of what's currently displayed on your computer or mobile device screen. These tools are useful for various purposes, including creating tutorials, sharing information, troubleshooting, or simply saving memorable moments on your screen.
Here are some popular screen capture tools:
Snipping Tool (Windows): This built-in Windows application allows you to capture screenshots of the entire screen, specific windows, or custom-selected areas. It's available on most Windows operating systems.
Snip & Sketch (Windows): This is an updated version of the Snipping Tool available in Windows 10 and later. It offers more features for capturing and annotating screenshots.
Print Screen (PrtScn) Key (Windows): Pressing the PrtScn key on your keyboard captures the entire screen, and you can paste it into an image editor like Paint for further editing.
Snagit: Snagit is a popular screen capture and screen recording software available for both Windows and macOS. It offers a wide range of features, including the ability to capture scrolling web pages and create GIFs.
Greenshot: This is a free and open-source screen capture tool for Windows. It allows you to capture screenshots of full screens, specific regions, or even individual windows. It also includes basic annotation features.
Lightshot: Lightshot is a free and simple screen capture tool available for Windows and macOS. It lets you capture specific areas of your screen and provides basic annotation options.
Snappy (formerly known as Snappy Snippet - Chrome Extension): If you want to capture screenshots directly from your web browser, Snappy is a handy extension for Google Chrome. It allows you to capture specific sections of web pages.
QuickTime Player (macOS): QuickTime Player, which comes pre-installed on macOS, can be used for screen recording. Simply go to "File" > "New Movie Recording," and you can select your screen as the input source.
OBS Studio: OBS Studio is a powerful, open-source software for screen recording and live streaming. It's available for Windows, macOS, and Linux, and it's often used by gamers and content creators.
ShareX: ShareX is a free and open-source screen capture and screen recording tool for Windows. It offers a plethora of advanced features, including customizable workflows and cloud integration.
Camtasia: Camtasia is a professional-grade screen recording and video editing software available for both Windows and macOS. It's widely used for creating tutorials and educational content.
The choice of screen capture tool depends on your specific needs, whether you require basic screenshot functionality or more advanced features like video recording, annotations, editing capabilities and uploading. Few of these tools allow automatic file uploading which will trigger upon screen capture, record or similar actions. We will focus mainly on ShareX as it is free and it offers a custom uploader option in which we can integrate Publitio. Creating custom uploaders in other applications should be fairly similar.
ShareX
After installing ShareX software we can play around with it using the default hotkeys.
To capture a screenshot, you can use one of several methods:
Full Screen: Press Print Screen on your keyboard to capture the entire screen.
Active Window: Press Alt + Print Screen to capture the currently active window.
Region: Press Ctrl + Print Screen to capture a custom region of your screen. Click and drag to select the area you want to capture.
Selected Region (with Hotkey): You can set a custom hotkey for capturing a selected region. Go to Task Settings > Hotkey Settings to configure it.
In fact most of the hotkeys can be replaced with a custom one but let's stick to the defaults for now. I will use Region capture (Ctrl + Print Screen) to create screenshots for this post.
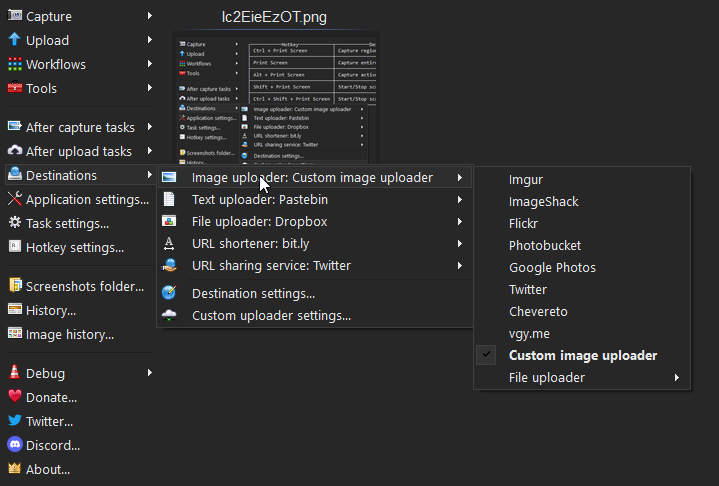
ShareX comes with some premade upload destinations which you can check by going to Destinations > Image Uploader.
Since we will be creating one for Publitio we will select Custom image uploader option.
Uploading files to Publitio requires authentication, unless using an Unsigned Preset.
Using a Preset you will be able to specify some additional settings to your files the only difference in the setup is the endpoint URL, when using standard upload the standard file create API endpoint URL is used:
https://api.publit.io/v1/files/create
When using a preset the preset API endpoint URL is used:
https://api.publit.io/v1/files/create/<preset_id>
We will stick to standard upload. So let’s prepare our Publitio account for authorizing and we can also create a folder where we want these files to be uploaded at, so they don't mix up with our regular Publitio uploads.
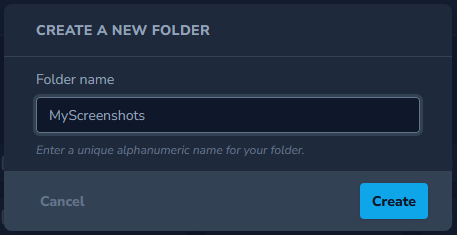
Login into your dashboard V2 and create a new folder, I will call mine ‘MyScreenshots’.

We will need to authorize our uploads. As Publitio now allows bearer tokens creation there is no need to generate API signatures like we had to do before and the process is much simpler.
Authorizing with Publitio bearer token
Bearer tokens are a secure way to manage access to protected resources in web applications and APIs. They are widely used in modern authentication and authorization protocols like OAuth 2.0 and are crucial for ensuring that only authorized users and applications can access sensitive data or perform specific actions. However, their security relies heavily on secure transmission and proper validation by the server.
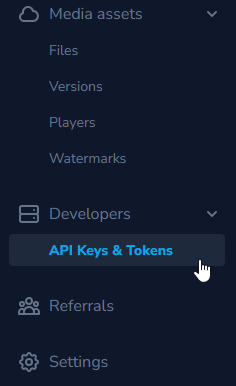
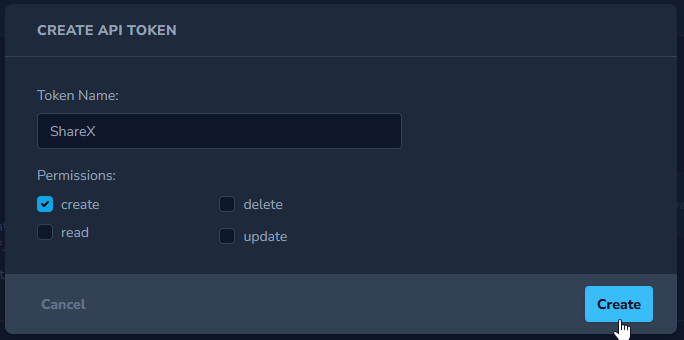
Head over to API Keys & Tokens page and let’s create our first token by pressing the Create API Token button.

Give your token a name and add a create permission to it, other permissions are not required for this kind of token usage.
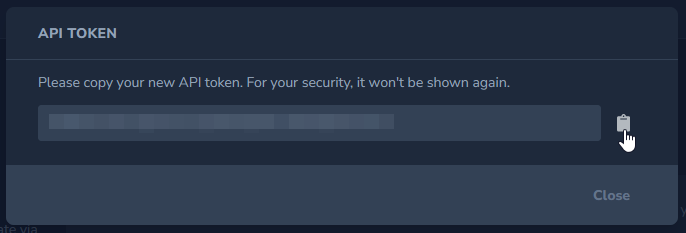
Click on the clipboard icon to copy the token and paste it somewhere you won’t lose it as once you close this modal the token won’t be shown to you again for security reasons.
Creating custom uploader
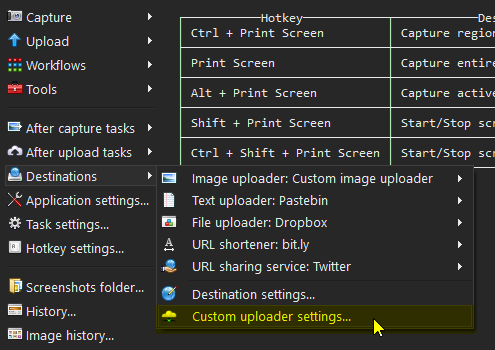
Let’s return to ShareX and create our custom uploader by navigating to Custom uploader settings.
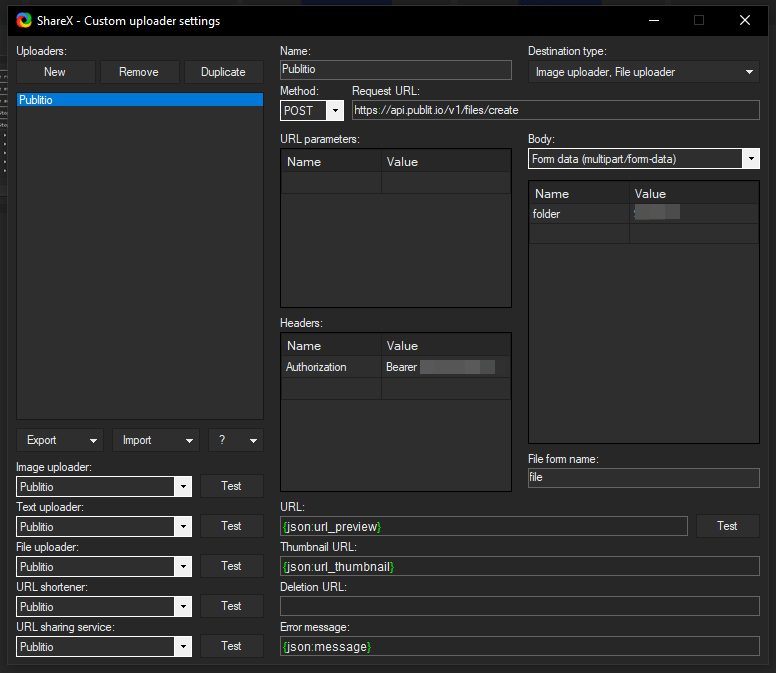
Create a new Uploader, give it a name and a type, I chose Publitio and type of Image uploader and File uploader.
Next, we want to specify the Request URL which will be:
https://api.publit.io/v1/files/create
Set method to POST and change the Body to Form data (multipart/form-data) as these are required settings for uploading a file to Publitio.
We also made a new folder which we can specify in the body data under the name of ‘folder’ if you do not want your uploads to end up in a folder you can leave body data empty.
Authorization is as simple as creating a header with the name of ‘Authorization’ and in the value type ‘Bearer ‘ (notice the space) and paste your freshly created token so it looks like this:
Bearer 70k3n…
Set file form name to ‘file’ and use URL, Thumbnail URL and Error message from the response from Publitio as {json:url_preview}, {json:url_thumbnail} and {json:message}. These are direct URLs to a file and its already created thumbnail and an error message if anything goes wrong.
To make things simpler you can import all of these settings by copying the content below:
{
  "Version": "15.0.0",
  "Name": "Publitio",
  "DestinationType": "ImageUploader, FileUploader",
  "RequestMethod": "POST",
  "RequestURL": "https://api.publit.io/v1/files/create",
  "Headers": {
    "Authorization": null
  },
  "Body": "MultipartFormData",
  "FileFormName": "file",
  "URL": "{json:url_preview}",
  "ThumbnailURL": "{json:url_thumbnail}",
  "ErrorMessage": "{json:message}"
}
In ShareX Custom uploader settings click on Import > From Clipboard.
Keep in mind that you will need to use your own bearer token and folder name/code.
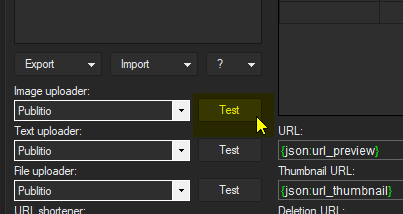
Go ahead and test your new uploader by pressing the Test button next to Image uploader in the bottom left.
You should get a popup with an image URLs like so:
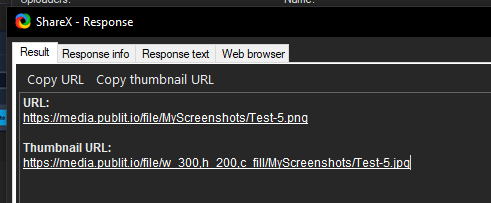
You can notice the image URL is pointing to Publitio, clicking on the link will open the test image in your browser.
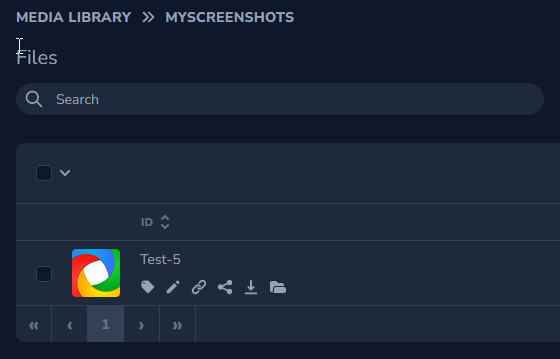
You will also see this test image in your Publitio media library.
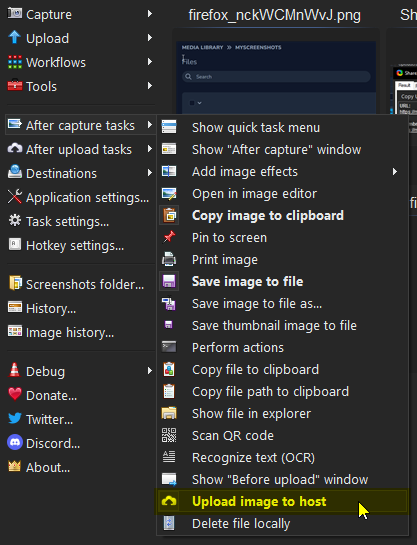
One last thing we need to do is tell ShareX that we want all new screenshots made to be seamlessly and automatically uploaded to Publitio by adding one more After capture task - Upload image to host.
Wiolla!, our setup is complete.
There are many more options and settings to play around with ShareX software and I personally will keep using it as it actually made making this post much easier with all its features and tools.
We have seen how easy it is to authenticate with Publitio using bearer tokens and it should be pretty simple to integrate it into other similar tools to make things simply easier without us even having to think about them.
If you want to take more advantage of Publitio and have some coding skills you can check these blog posts too:
JS image gallery with Publitio
PHP image gallery with Publitio
Happy uploading!
Publitio Team.


